
3.5
Owner's of the Makita Saw 5007F gave it a score of 3.5 out of 5. Here's how the scores stacked up:


6
17. Never attempt to saw with the circular saw held
upside down in a vise. This is extremely danger-
ous and can lead to serious accidents.
18. WARNING: Blade coasts to stop after switch is
released. Contact with coasting blade can cause
serious injury. Before setting the tool down after
completing a cut, be sure that the lower (tele-
scoping) guard has closed and the blade has
come to a complete stop.
19. Some material contains chemicals which may be
toxic. Take caution to prevent dust inhalation
and skin contact. Follow material supplier safety
data.
SAVE THESE INSTRUCTIONS
WARNING:
MISUSE or failure to follow the safety
rules stated in this instruction manual
may cause serious personal injury.
SYMBOLS
USD292-2
The followings show the symbols used for tool.
V............................volts
A ...........................amperes
Hz..........................hertz
.................alternating current
.................alternating or direct current
.......................no load speed
.......................Class II Construction
.../min....................revolutions or reciprocation per
minute
FUNCTIONAL DESCRIPTION
CAUTION:
• Always be sure that the tool is switched off and
unplugged before adjusting or checking function on
the tool.
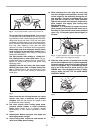
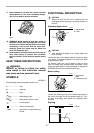
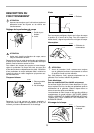
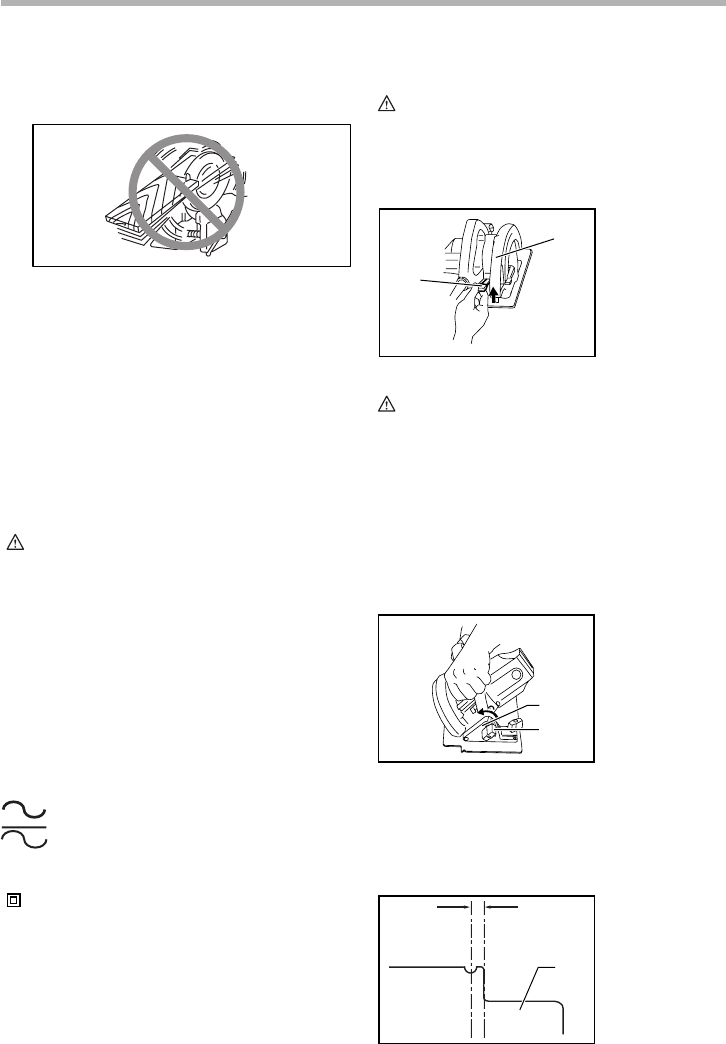
Adjusting depth of cut
CAUTION:
• After adjusting the depth of cut, always tighten the
lever securely.
Loosen the lever on the depth guide and move the base
up or down. At the desired depth of cut, secure the base
by tightening the lever.
For cleaner, safer cuts, set cut depth so that no more
than one blade tooth projects below workpiece. Using
proper cut depth helps to reduce potential for dangerous
KICKBACKS which can cause personal injury.
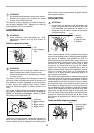
Bevel cutting
Loosen the clamping screw on the bevel scale plate on
the front of the base. Set for the desired angle (0° - 45°)
by tilting accordingly, then tighten the clamping screw
securely.
Sighting
Fig. 7
n
˚
1. Depth guide
2. Lever
1. Bevel scale
plate
2. Clamping screw
1. Base
1
2
001340
1
2
001357
1
BA
001374


Find Your Products By Category
Please Login
